
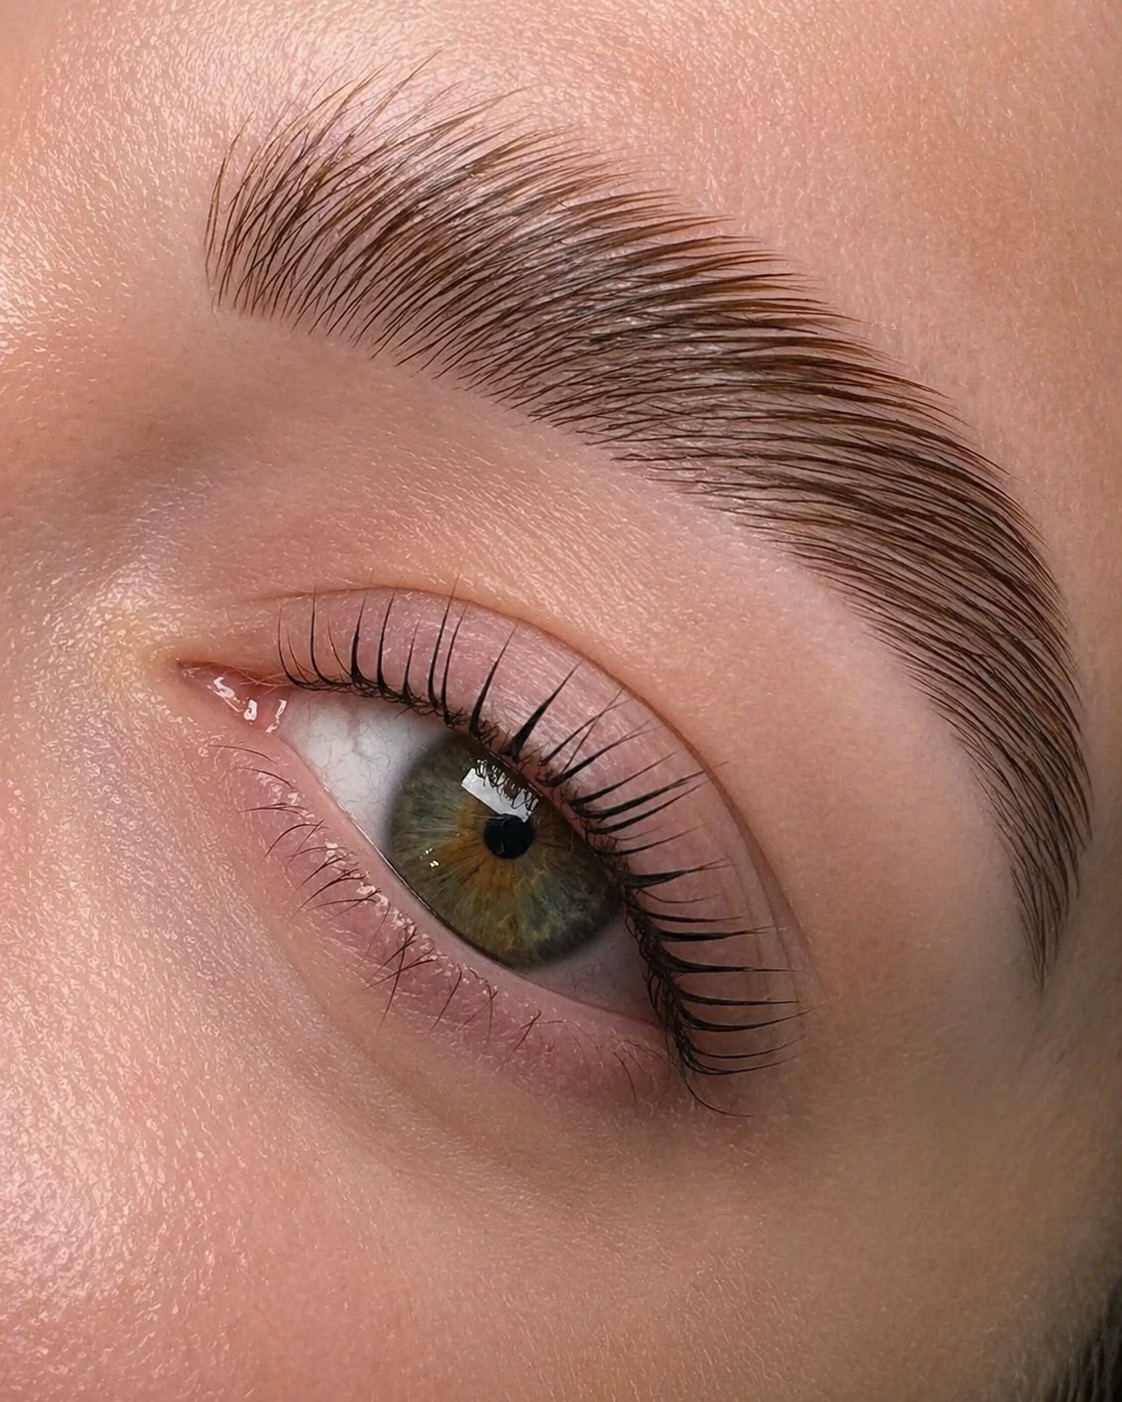
Every few weeks I have a new client sit in my chair in Orange, CA and say some version of "I saw brow lamination on TikTok and I want that look — is it worth it?" The honest answer is yes, for the right person, if you understand what the treatment actually does and what the aftercare actually requires.
The look you see on social media is real. The upkeep is also real. Both matter if you want your brows to still look great five weeks later, not just five days later.
Here's the walkthrough I give every client before we book — the process, the aftercare that actually keeps results looking fresh, and who this treatment is honestly for.
What is brow lamination, exactly?
Brow lamination is a semi-permanent treatment that reshapes your brow hairs so they lie in an upward, brushed-up direction — that fluffy, feathered look you see on models and influencers. Nothing is added to your brows. No color is applied unless you also book a tint. The hair is your own, just softened, restructured, and locked into a new shape.
The chemistry is close to a soft perm. A keratin-based lifting solution breaks down the natural bonds in the brow hair (keratin is the structural protein your hair is made of), a shaping solution locks the hair into its new position, and a nourishing serum finishes and conditions. It's the same principle as chemical straightening or perming, just scaled down and applied to a tiny hair area.
The eyebrow itself serves a real function — protecting the eye from sweat and debris — which is why keeping the hair healthy during and after the treatment matters more than clients often realize.
Who brow lamination is really for
Not everyone needs this treatment. Here's how I sort candidates:
Great candidates for brow lamination
- Downward-growing brow hair. If your brows lie flat or point downward instead of naturally sweeping up, lamination is the single easiest fix. Suddenly your brows have shape without any pencil work.
- Uneven brow shape or gaps. Brushed-up brow hair fills gaps visually because it covers more surface area than flat hair. Lamination often makes sparse brows look fuller without any tint or microblading.
- Anyone who spends more than five minutes daily on their brows. Lamination gives you the "fluffy brow look" without the daily pencil + gel + brush routine.
Not the right treatment for
- Very fine or sparse brow hair — the effect will be minimal. Consider a tint or a microblading consult instead.
- Anyone with active dermatitis, eczema, or open irritation around the brow area. Wait until skin is calm.
- Clients with a known allergy to keratin or perming products. Patch-test first.
- Anyone under 18 without a parent present — this is a chemical treatment on a hair area very close to the eye.
The brow lamination process — step by step
Your appointment is 45 to 60 minutes and follows the same six-step sequence in every clinical setting that does this properly:
- Consultation and mapping. I look at your natural brow shape, growth direction, and any sparse spots. We agree on the finished shape before we start.
- Cleanse and prep. The brow area is cleaned of oil, product, and makeup so the solutions can penetrate the hair evenly.
- Lifting solution. The first solution softens the hair bonds. It stays on for a few minutes — timing depends on your hair thickness and coarseness. This is the part where at-home kits go wrong: over-timing burns the hair.
- Shape and comb. While the hair is soft, I brush it into the shape we agreed on. This is where the "brushed-up" look is created.
- Setting solution. The second solution locks the new shape in. Another timed step.
- Nourishing serum plus optional tint or wax. A hydrating serum protects the hair. If you're adding a tint, it goes on here. Cleanup shaping (wax or tweeze) usually happens last.
You'll leave the studio with brows that look defined, feathered, and camera-ready — with the real "wow" moment landing the next day once the shape has fully set and you've had a chance to see it dry.
How long brow lamination lasts
Six to eight weeks is the typical range in Orange County, and eight weeks is what a well-cared-for lamination looks like. That timeline lines up with the natural growth cycle of your brow hair — as new hairs come in, they aren't laminated, so the overall look gradually softens.
The variables that affect your specific timeline:
- Sun exposure. UV breaks down the treatment faster. If you're outdoors constantly, expect closer to six weeks.
- Retinol and glycolic acid. These migrate up into the brow when applied nearby and dissolve the lamination over time.
- How aggressively you cleanse. Vigorous scrubbing right on the brow area shortens results.
- Sweat and moisture. Not a problem after the first 24 hours, but heavy repeated exposure (daily gym plus sauna) still trims some longevity.
Ready to book?
Come in for a consultation and I'll look at your natural brow shape, growth direction, and daily routine — then tell you honestly whether lamination is the right call.
Book a Brow ConsultAftercare — the first 24 hours matter most
The first day after lamination is when the shape sets. Everything you do or don't do in that window determines how the treatment ages. Here are the rules I send home with every client:
- No water on the brow area for 24 hours. That means no showering water hitting your face directly, no swimming, no steam room, no sauna. Wash your face carefully around the brows on day one.
- No skincare products on the brows for 24 hours. No cleanser, no serum, no moisturizer directly on the brow hair. Product residue interferes with the setting phase.
- No touching, rubbing, or brushing on day one. The shape needs to lock in undisturbed.
- Sleep on your back for the first two nights if possible. Face-down sleeping presses the brow flat, and pressed brows can set that way.
- After day two, brush your brows daily with a clean spoolie. This is the single biggest predictor of how long the "brushed-up" look holds. Brushing keeps the hair trained upward as new hair grows in.
- Keep retinol and glycolic acid at least a quarter-inch away from the brow area. If you use those products, apply them carefully — active ingredients breaking down the lamination is the #1 reason results fade early.
- Use SPF 30 daily on the face. The American Academy of Dermatology recommends daily broad-spectrum sun protection for all skin — and UV is one of the main things that ages a lamination early.
Common mistakes that kill your results
Ninety percent of clients who come back saying "it only lasted three weeks" made one of these three mistakes:
Mistake #1 — Skincare product hitting the brows. Retinol serum applied "near the brows" almost always migrates into the brow hair overnight. Same with glycolic acid toners and high-strength vitamin C. If those are in your routine, be surgical about application — a cotton swab is your friend.
Mistake #2 — Not brushing daily. The lamination sets a new baseline shape, but new hair grows in un-laminated. If you don't brush daily to train those new hairs upward with the older ones, the overall shape looks messy within three weeks. Thirty seconds a day fixes this.
Mistake #3 — Sleeping face-down on new lamination. The first two nights are the whole ballgame. Sleep on your back or side, and use a silk pillowcase if you can. This is worth a small routine change.
The clients whose lamination lasts eight full weeks all do the same three things: they brush daily, they keep active ingredients off the brow area, and they use SPF.
Pairing lamination with a tint, wax, and skin care
Brow lamination is a shape treatment. It doesn't add color. If your brow hair is naturally light, sparse, or gray, a lamination alone will read as "shape without pigment" — beautiful, but not the full look most clients are picturing. That's why the lamination-plus-tint combo is our most-booked service.
The tint takes about ten minutes at the end of the lamination. It darkens your existing brow hair to a black, brown, or auburn depending on your natural coloring, and stays visible for four to six weeks — usually about a week less than the lamination itself. Most clients rebook both services together every six weeks.
Beyond the tint, brow lamination pairs naturally with a few other services at our Orange, CA studio:
- Cleanup waxing or tweezing at the end of the appointment — cleaning up the shape after the hair is set in its new direction so you leave with a fully finished brow.
- A lash lift at the same visit — the eye-area duo. Lift, lamination, tint, done. One appointment covers everything from brow to lash.
- A facial the following week — treating the skin around the brows keeps the whole area looking calm and cohesive.
- A monthly HydroFacial for clients who want the full glow-plus-brow reset every four weeks.
- Full-service care at our Orange, CA skin care clinic for anyone building a monthly cadence for skin, lashes, and brows together.
If you want to book the whole eye-area refresh at member pricing, the membership plans at our Orange, CA studio are designed for exactly this kind of monthly cadence.
My honest recommendation for Orange, CA clients
If your brow hair grows downward, if you spend more than a few minutes daily on brow makeup, or if you want a "just walked out of a photoshoot" look without any daily effort — book the lamination. Add a tint if your natural brow color is light. Commit to the daily brushing habit. You'll be surprised how much time you save every morning for the next six to eight weeks.
If your brows are already dense and grow in the direction you like, lamination is not the treatment you need. Save the money and book a shaping wax and tint instead. That combo alone often lifts a good brow into a great one.
And if you're new to brow work generally, come in for a consult first. I would rather send you home with a shaping plan and no chemistry than lock a treatment into brows that don't need it.
Either way — the goal isn't the treatment, it's the brow. Come let me look at yours and I'll tell you the honest call.